

Chapter 01
Install and activate the app
- Create or sign in to your account.Purchase or redeem an eligible license from the secure Account Portal.
- Download the current Windows setup.Your dashboard provides the setup after access is assigned to your account.
- Run setup and open TheIsleMinimap.Enter your license key when requested. One active installation is supported per license.
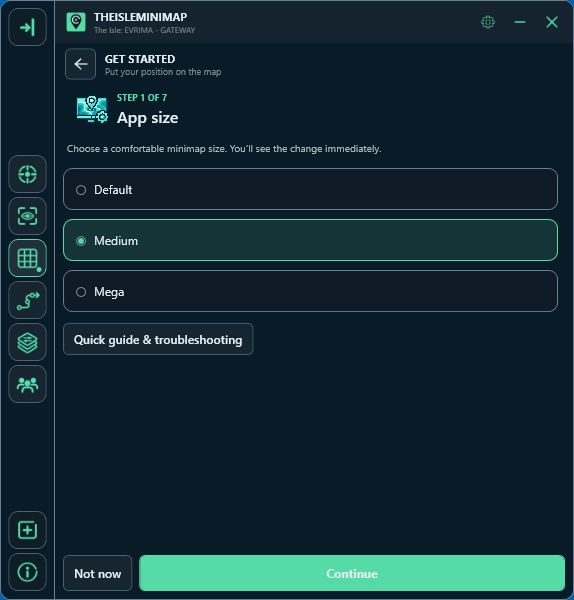
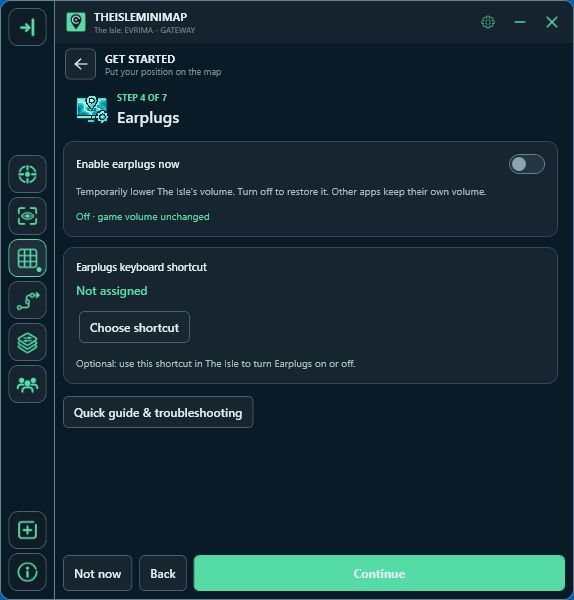
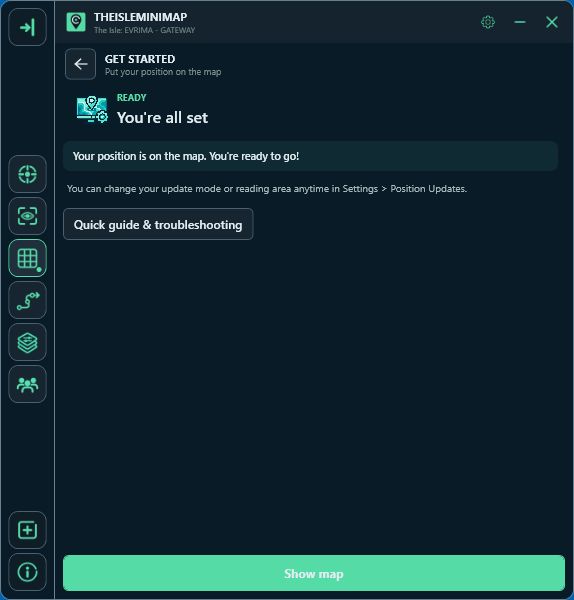
- Follow Get started.After first activation, the assistant helps you choose app size, opacity, mouse interaction, an Earplugs shortcut and position updates.
Reopen the assistant anytime from Settings > Position Updates > Get started. The Quick guide on that page provides short reading instructions and troubleshooting.
Internet access is required for activation, periodic license checks, software updates and optional squad features. The local map, layers and position tools do not require joining a squad.
More screenshots 4

Chapter 02
Understand the main map
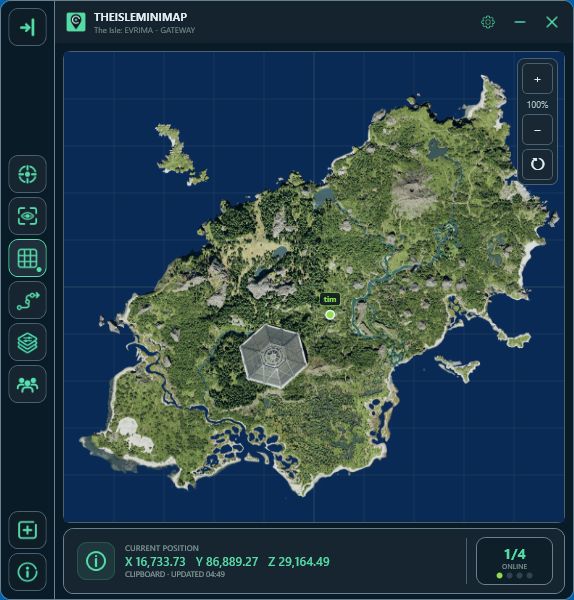
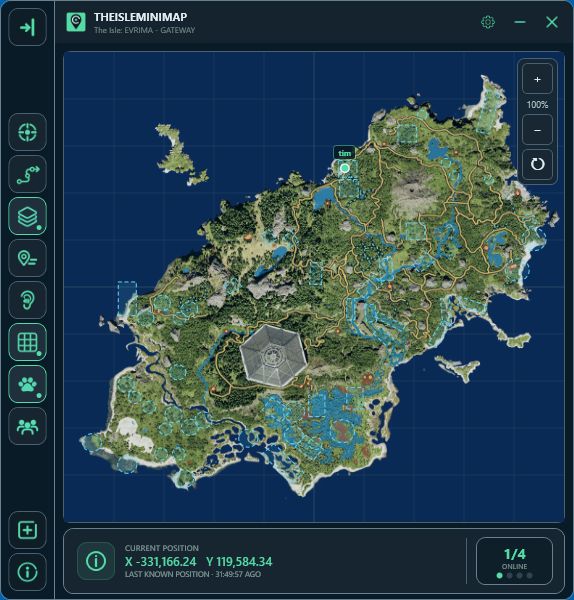
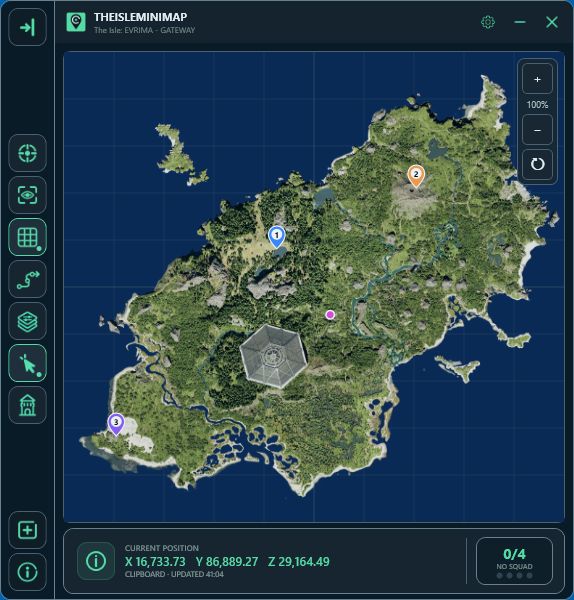
- Header: shows the current game and Gateway map, plus Settings, minimize and close controls.
- Quick Access sidebar: keeps selected actions attached to the left side without reducing the map area.
- Map: displays Gateway, your marker, squad markers, enabled layers, the shared pin and optional movement trail.
- Zoom controls: use + and − to change scale; use reset to restore the default view.
- Current Position: displays coordinates, the active capture method and when the latest position arrived.
- Squad counter: shows current online membership and opens Squad Settings with Squad access. With Solo Lifetime, it explains how to view Squad plans.
More screenshots 1

Chapter 03
Set up position updates
Choose how Asset Location is read
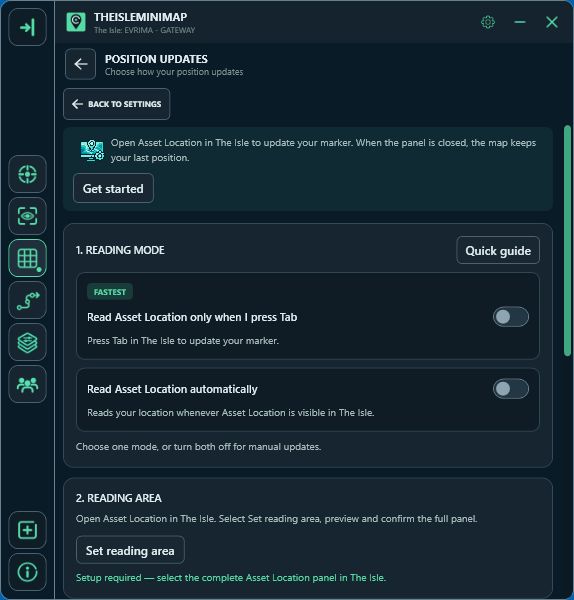
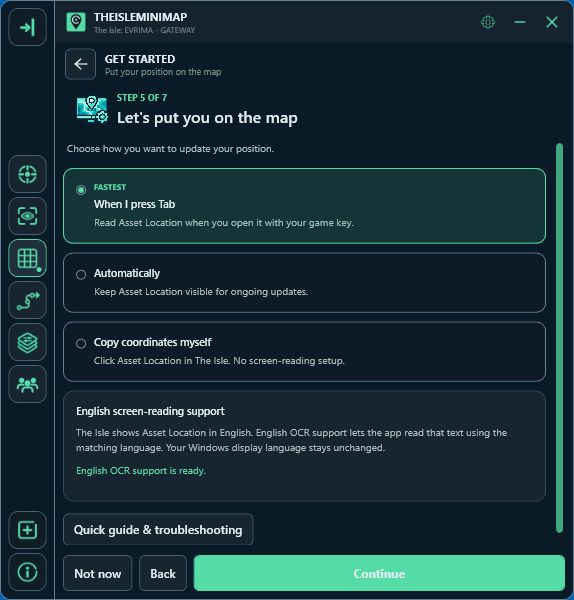
- Open Settings > Position Updates.Choose Read Asset Location only when I press Tab for the fastest reading workflow, or Read Asset Location automatically to read while the panel is visible. Turning one mode on switches the other off.
- Match your game key.Tab is the default. If you changed the key that opens Asset Location in The Isle, use Change key in the app to assign the same key. You can hold Shift to sprint or Ctrl to crouch while pressing your reading key.
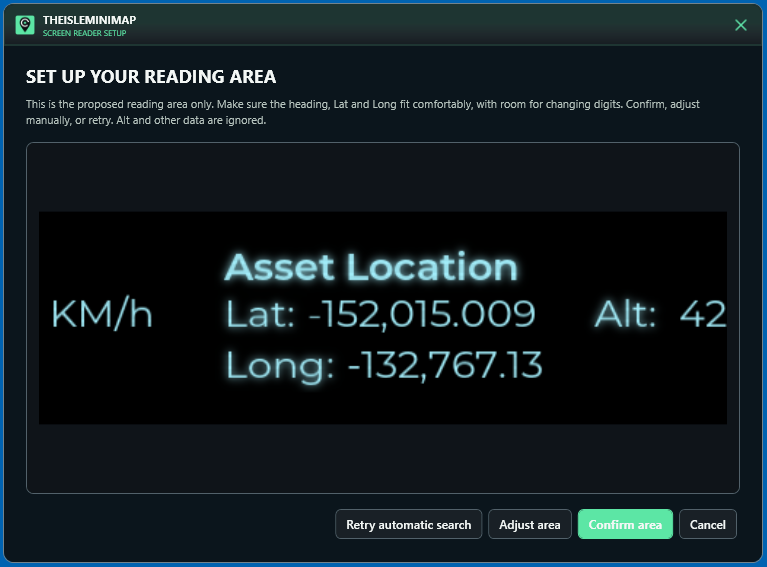
- Select Set reading area.Open the in-game panel so the complete Asset Location is visible, then click Find automatically in the setup window. Keep the coordinates visible during capture, review the preview and confirm the area. Both reading modes use it.
- Return to the game.Keep The Isle in the foreground. Press your assigned key to open the panel in key mode, or show the panel in automatic mode. Check Current Position for a fresh update.
If the app requests administrator access for key mode, follow its restart explanation and Windows permission prompt. Administrator options are also in Position Updates. The saved area is matched to the game window and display settings; set it again if it no longer covers Asset Location correctly. Captured screen content stays on your computer and is not uploaded.
English screen-reading support
If Get started reports missing English support, choose Install English OCR support and follow the Windows permission prompt. Asset Location uses English labels; this adds the recognition support used to read them without changing your Windows display language. Keep the app open while Windows downloads it. Clipboard updates do not need OCR.
Manual clipboard capture
Open the in-game Tab panel and click the displayed Asset Location coordinates. TheIsleMinimap recognizes the copied position and updates the marker; you do not need to paste it anywhere.
More screenshots 8
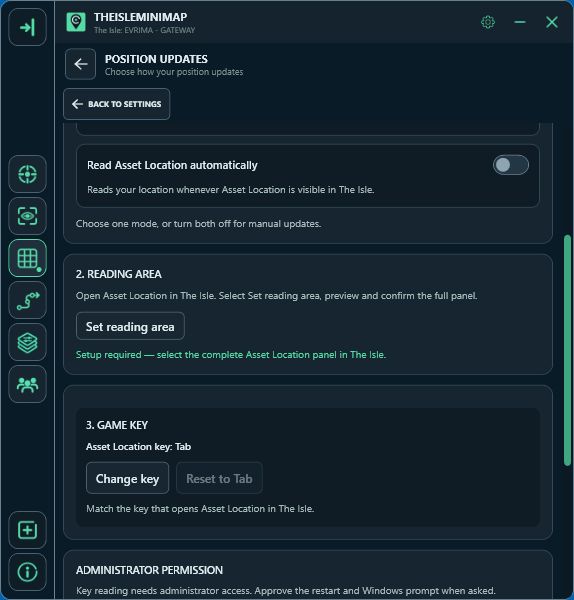
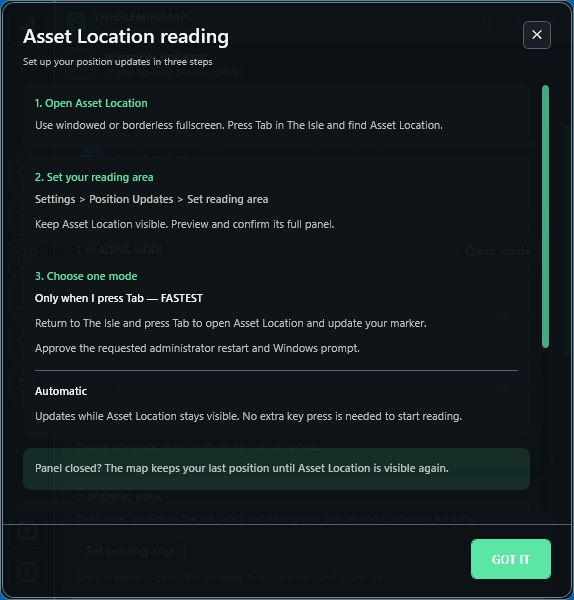
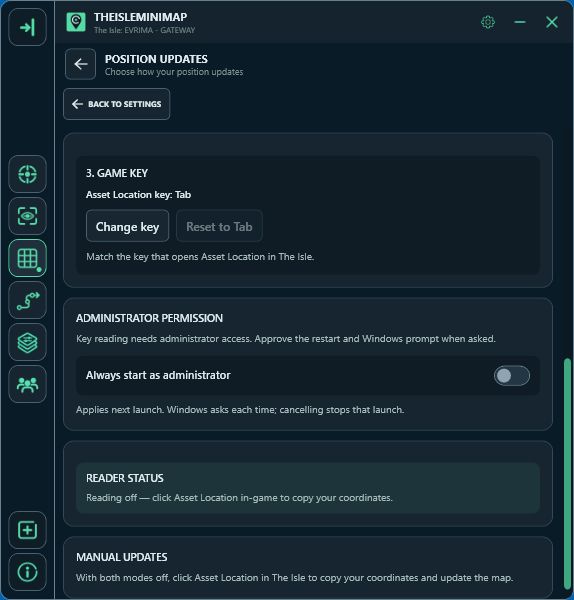
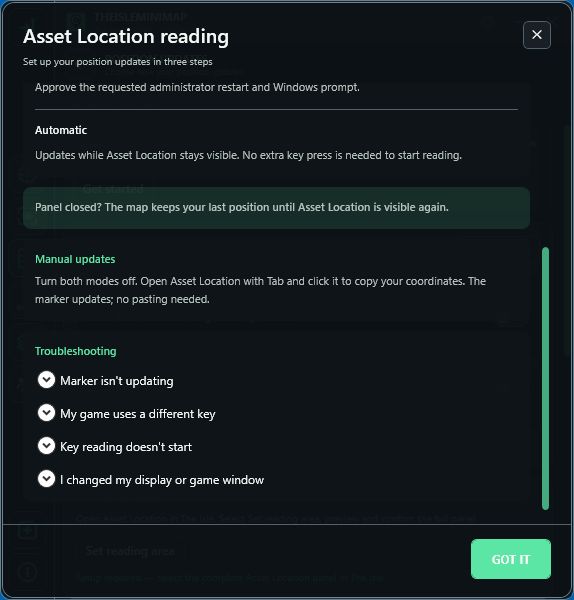
Key mode starts a reading request when you press your assigned Asset Location key while The Isle is active. Tab is the default; change it in Settings > Position Updates if your game uses another key. Enabling this mode requires an administrator restart and approval of the Windows permission prompt.
Chapter 04
Navigate, follow and trace your route

Chapter 05
Choose map layers and filters
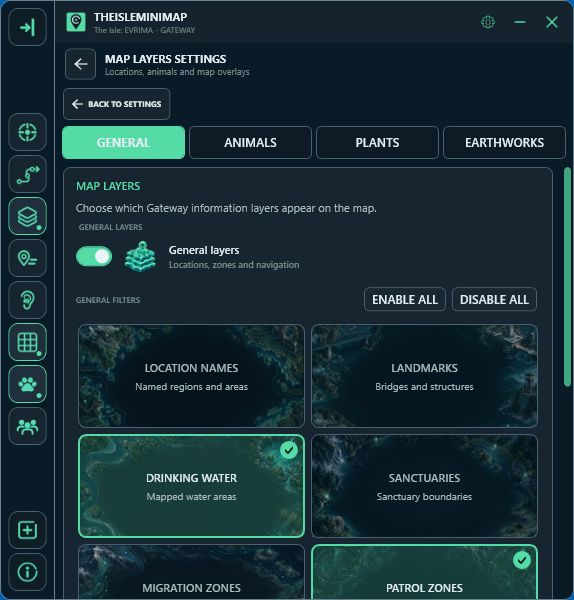
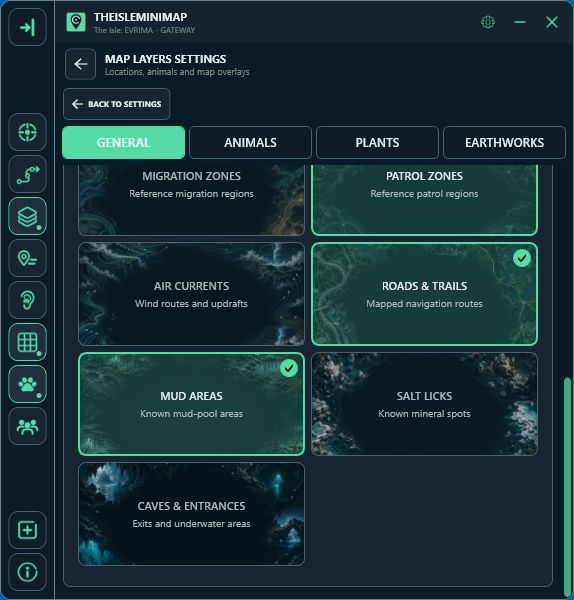
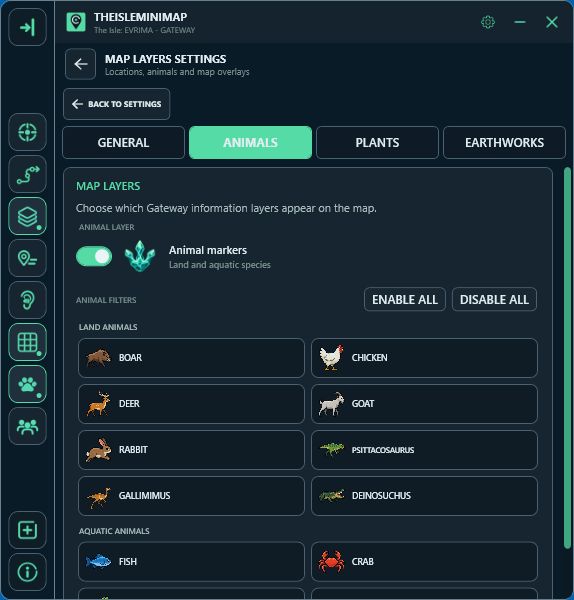
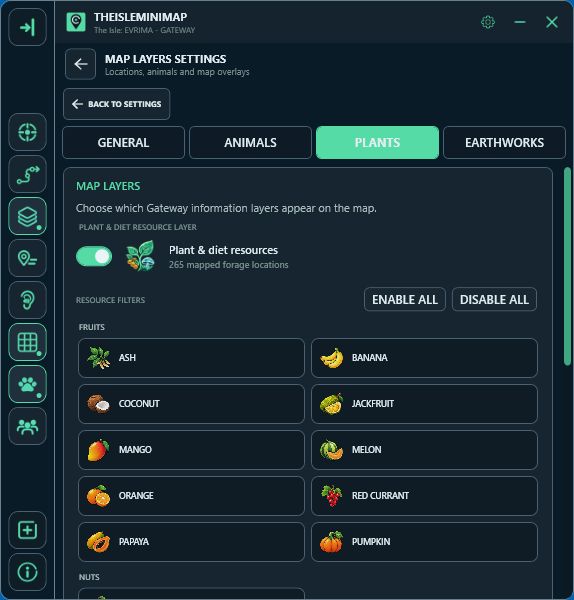
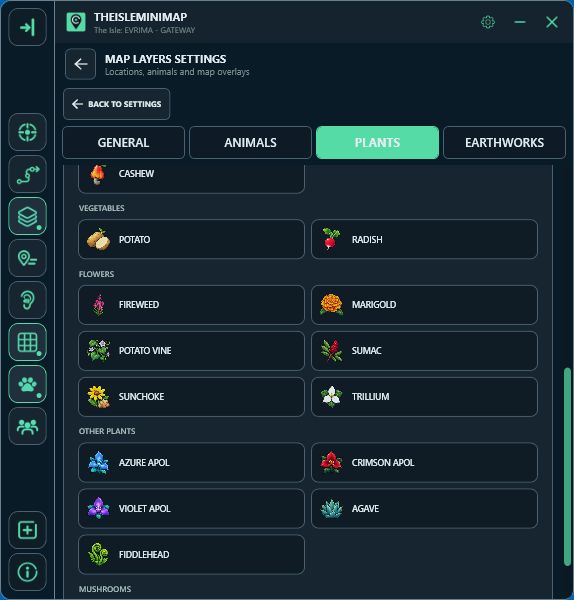
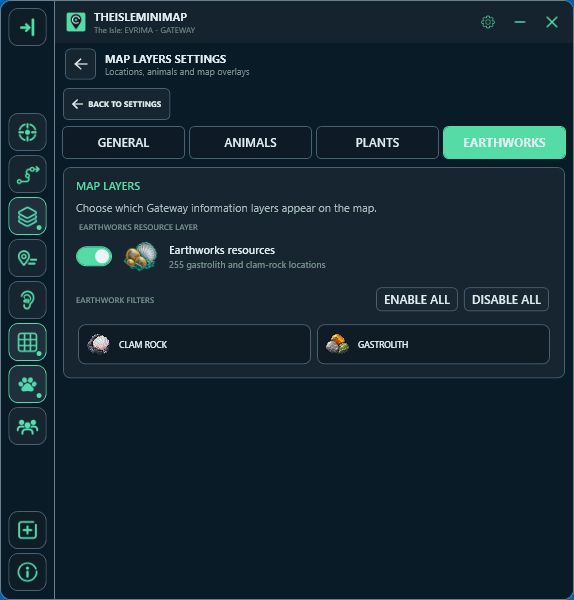
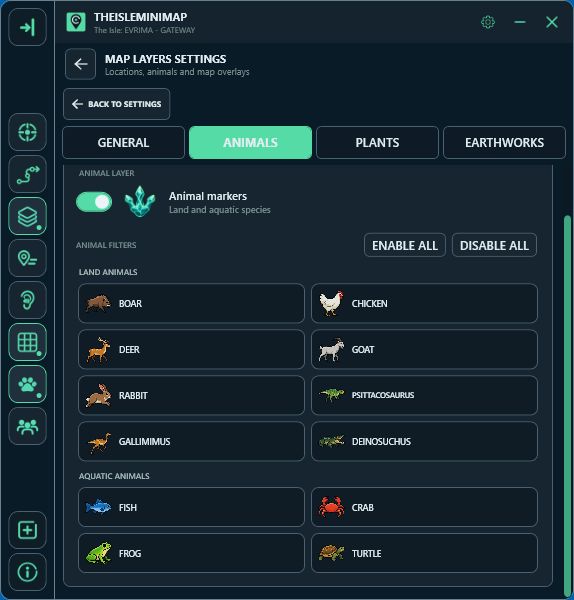
Open Map Layers Settings and use the four tabs to switch instantly between General, Animals, Plants and Earthworks. Turn on the layer you want, then choose its individual filters. General layers start off so the first map remains clean.
- General: location names, landmarks, drinking water, sanctuaries, migration zones, patrol zones, air currents and updrafts, roads and trails, mud areas, salt licks, caves and entrances.
- Animals: choose individual land or aquatic species.
- Plants: select only the fruits, nuts, vegetables, flowers, plants and mushrooms relevant to your dinosaur.
- Earthworks: show mapped gastrolith and clam-rock locations separately from other resources.
- Enable All and Disable All: quickly change the selected tab without affecting the other layer groups.
Filters remain visible but unavailable while their layer is turned off. Layer data follows the supported Gateway map and can be refreshed through app updates when the game changes.
More screenshots 7
Chapter 06
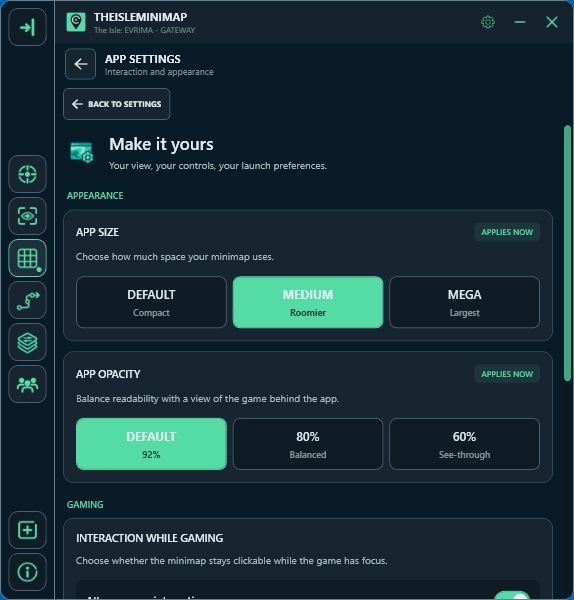
Adjust size, opacity and interaction
- Default: keeps the original compact app and map geometry.
- Medium: adds more map and settings workspace while preserving the same controls.
- Mega: provides the largest supported app and map workspace that fits the active display.
- Opacity: choose Default, 80% or 60% for the complete app window.
- Mouse interaction: the inactive overlay remains click-through by default. Enable mouse interaction when you want the app to accept clicks while the game has focus, then use Alt+Tab when necessary.
Chapter 07
Use Earplugs and a custom shortcut
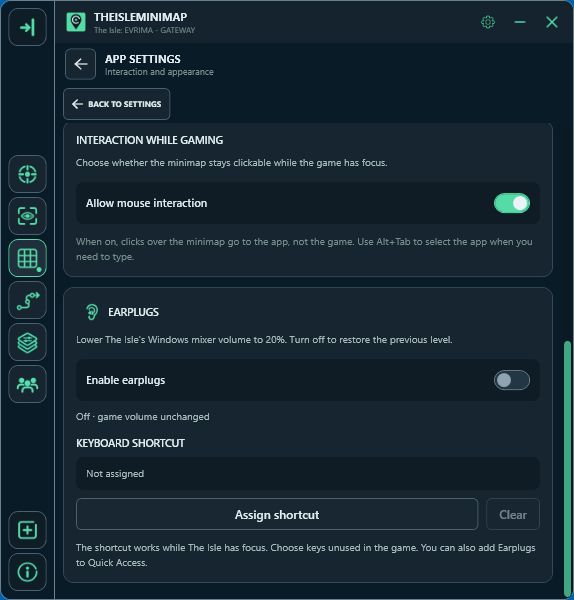
Earplugs lowers only The Isle game audio through Windows Volume Mixer. It does not turn down your microphone, voice chat or other apps.
- Open Settings → TheIsleMinimap App Settings.Find the Earplugs card and turn on Enable earplugs while the game is running.
- Reduce the game volume.The game mixer level is capped at 20%. If it was already quieter, Earplugs does not increase it. This is a mixer level, not 20% of your previous volume.
- Assign a shortcut if you want one.Select Assign shortcut, then press a key or a Ctrl, Alt or Shift combination, such as Ctrl + P. Escape cancels assignment; Clear removes the saved shortcut.
- Toggle while playing.The shortcut works while The Isle has focus. Choose keys unused by the game because game actions can still receive the same input. You can also use the switch or add Earplugs to Quick Access.
Turning Earplugs off restores the mixer level saved before it was enabled. Closing the minimap normally also restores it; a crash or forced process termination can prevent that cleanup. If needed, restore The Isle volume in Windows Volume Mixer.
Tab and Windows-key combinations are unavailable. Assigning an Earplugs shortcut does not require enabling Tab-only coordinate reading.
Read the full Earplugs and shortcut guideMore screenshots 1

Chapter 08
Build your Quick Access sidebar
- Show or hide the sidebar.Use Quick Access Settings or the top sidebar button. The matching header button restores it, and the map size stays unchanged.
- Add a shortcut.Select + at the bottom, then choose an available action from the full-height slide-out selector.
- Remove a shortcut.Right-click its button. That action becomes available under + again.
- Keep up to eight actions.Choose from position, navigation, capture, privacy, layer, squad, service and update controls.
- Open the information button.The built-in guide repeats the add, remove, hide and restore instructions inside the app.
More screenshots 4
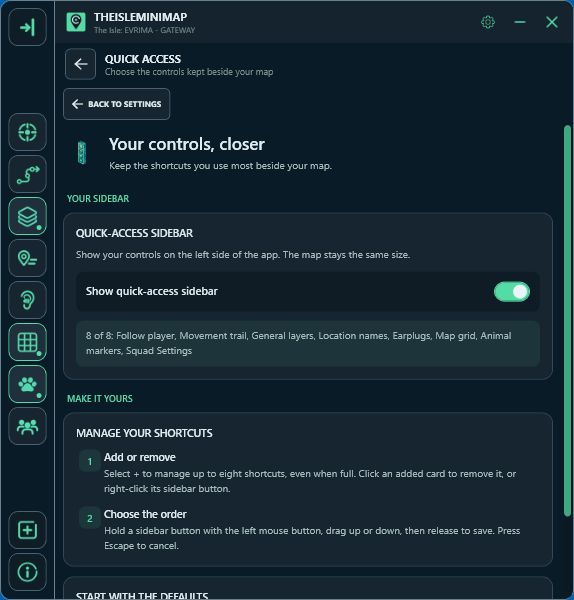
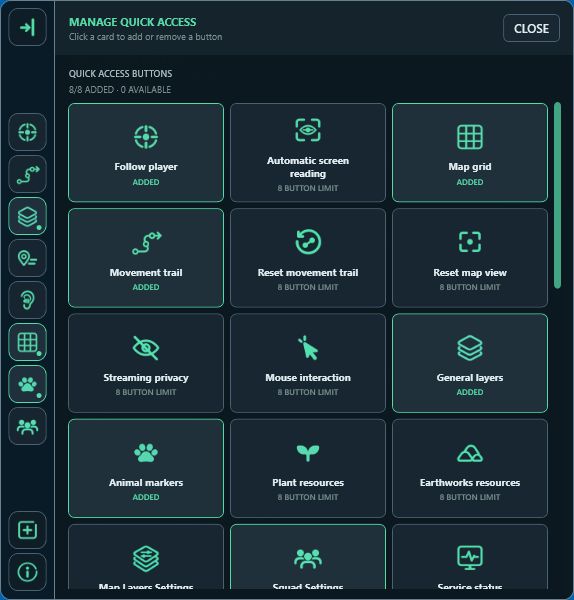
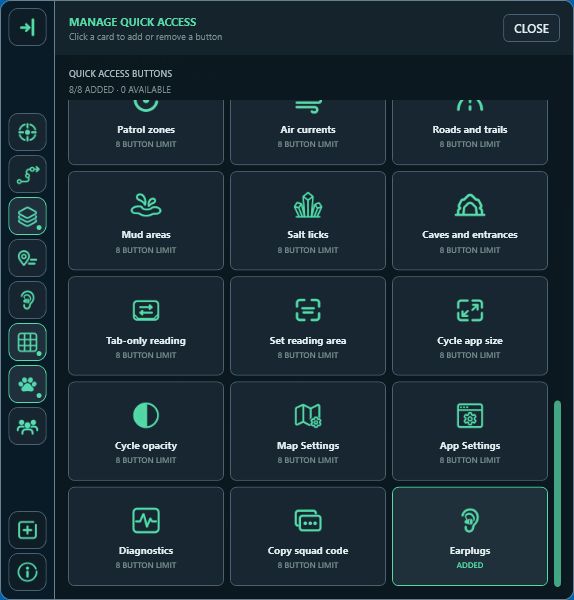
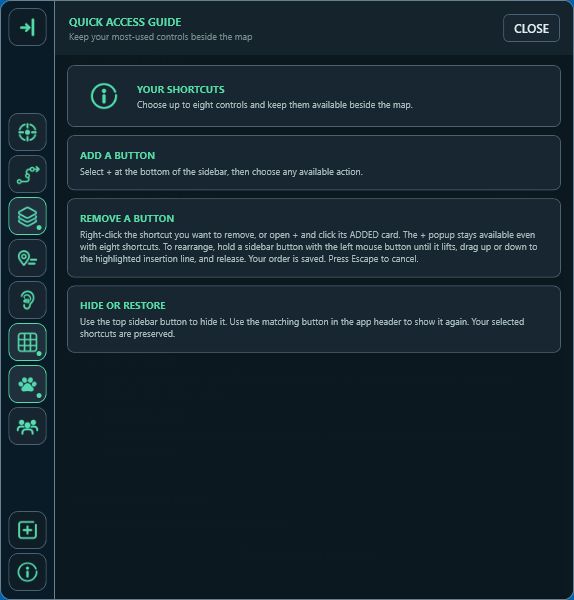
Choose from 36 available actions. To rearrange shortcuts, hold a sidebar button until it lifts, drag it to the insertion line and release. Your order is saved; Escape cancels a rearrangement.

Chapter 09
Choose your Solo marker and personal pins
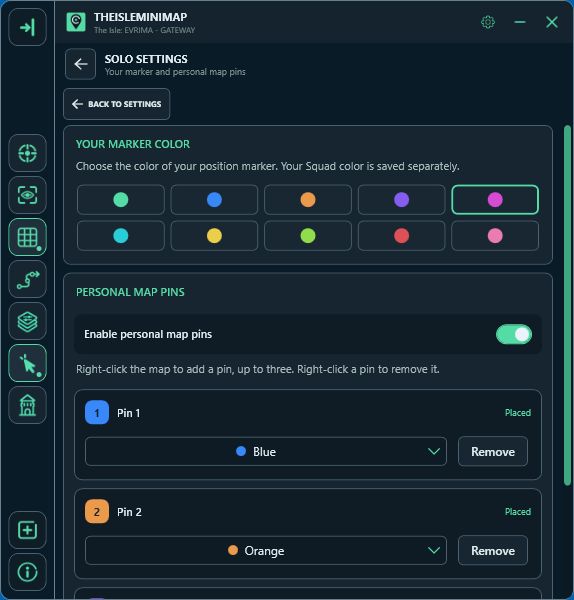
With Solo Lifetime, open Settings > Solo Settings under Solo & Privacy.
- Choose your marker color.Your own position uses this color on the map.
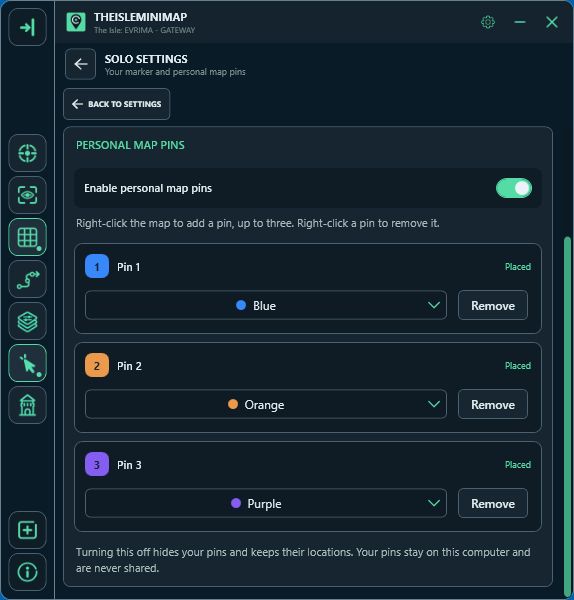
- Enable personal map pins.Turn on the switch when you want to use up to three saved destinations.
- Choose three different pin colors.A color already used by another pin is unavailable.
- Place or remove a pin.Right-click the map to place the next unused pin. Right-click a pin, or use its Remove button in Solo Settings, to remove it.
Turning personal pins off hides them and keeps their saved locations. Your pins stay on this computer and are never shared with a squad. Squad plans use one shared destination pin instead.
More screenshots 3

Chapter 10
Create or join a private squad
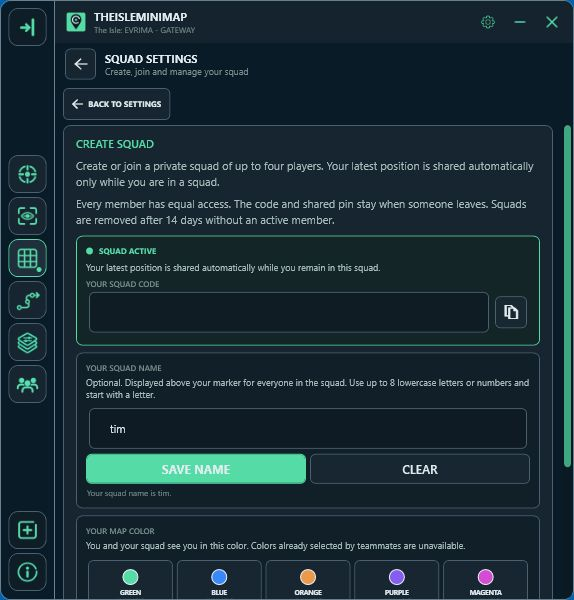
- Create or join.Create a new private squad and share its code directly, or paste a code received from a friend.
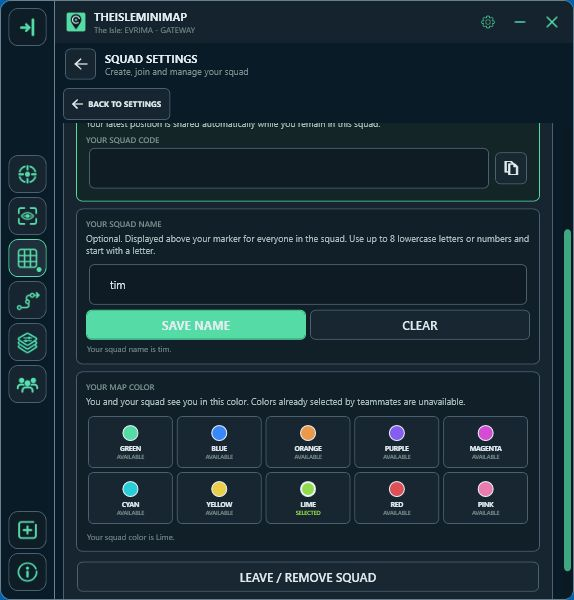
- Choose your identity.Select an available marker color and optionally add a lowercase name of up to eight letters or numbers, beginning with a letter.
- Share while connected.Your latest valid position is shared automatically only while you remain in the squad. Your complete movement trail stays local.
- Coordinate together.See up to four current positions, colored names, the online counter and one shared destination pin.
- Leave when finished.Use Leave / Remove Squad to leave your own slot. Other members keep the squad and its shared pin.
Squad features are included with Squad Quarterly, Squad Monthly and Squad Lifetime. Solo Lifetime provides local navigation plus its own marker color and up to three personal pins, without online squads.
Squads have no leader: every member has equal access. When Squad access ends, your slot is freed automatically. Temporary connection problems keep your saved squad. A squad is removed after 14 days without an active member.
Monthly and Quarterly include four licenses. Invite friends from Account Portal > Licenses; they accept there before activating their own key. The in-app squad code is a separate step for joining the same map group.
More screenshots 1

Chapter 11
Protect details while streaming
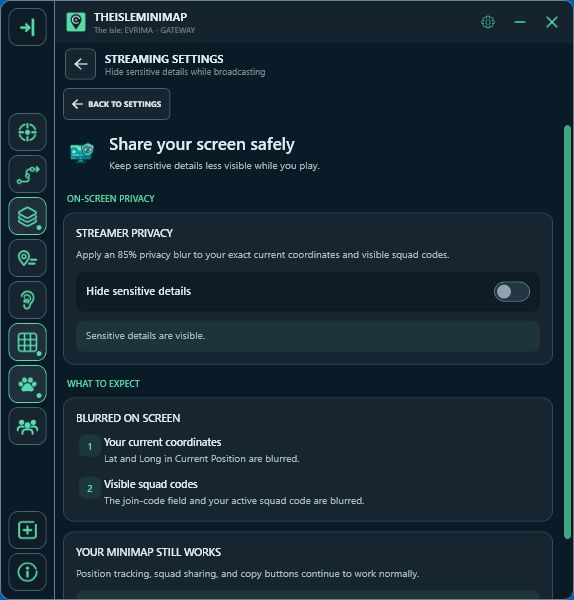
Open Streaming Settings and enable Hide Sensitive Details before broadcasting or recording when coordinates and squad codes must stay private.
- Applies an 85% privacy blur to the exact Current Position coordinates.
- Blurs active and entered squad codes inside Squad Settings.
- Keeps position tracking, squad sharing and copy actions working normally.
- Can be disabled again whenever sensitive information no longer appears on stream.

Chapter 12
Updates, diagnostics, licenses and uninstalling
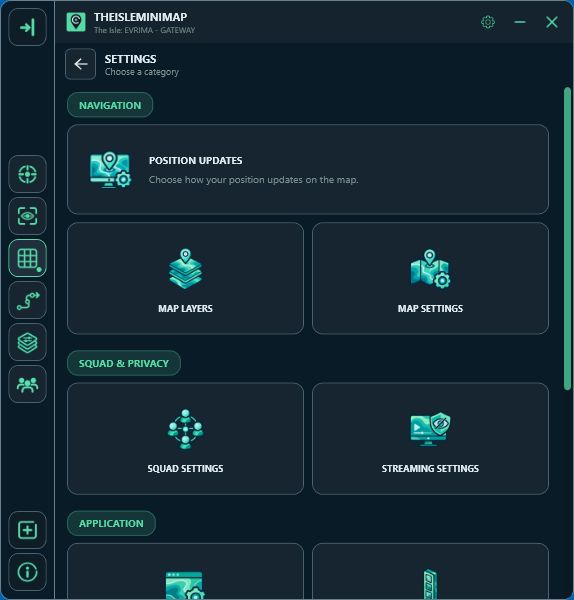
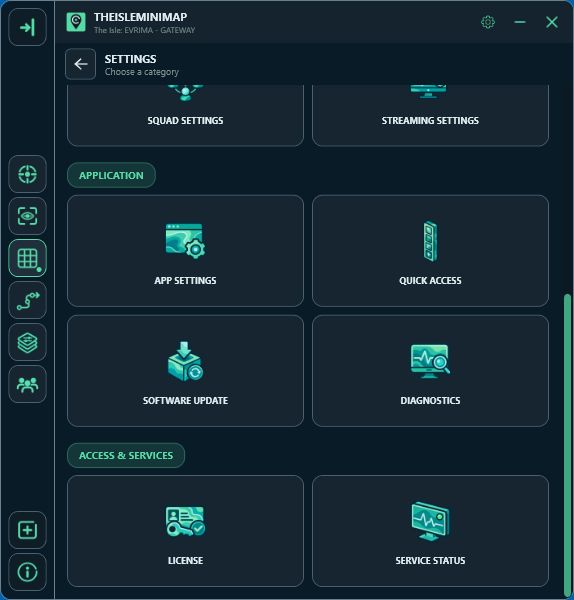
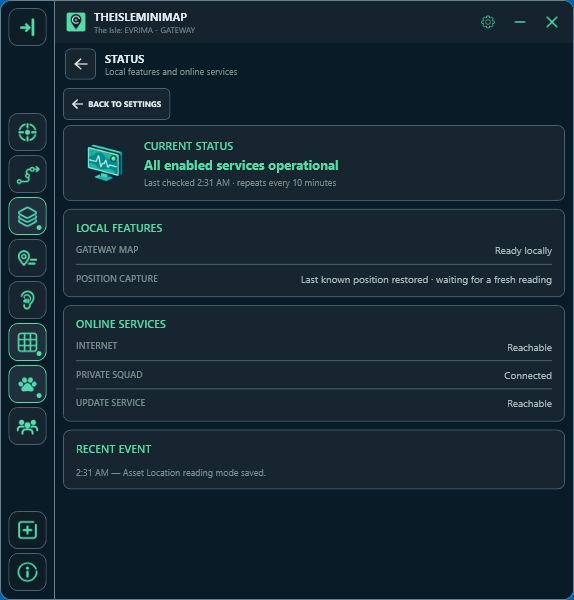
 Service StatusCheck the local map and position tools, internet connection, squad connection and software updates. Checks repeat automatically every ten minutes; there is no manual refresh button.
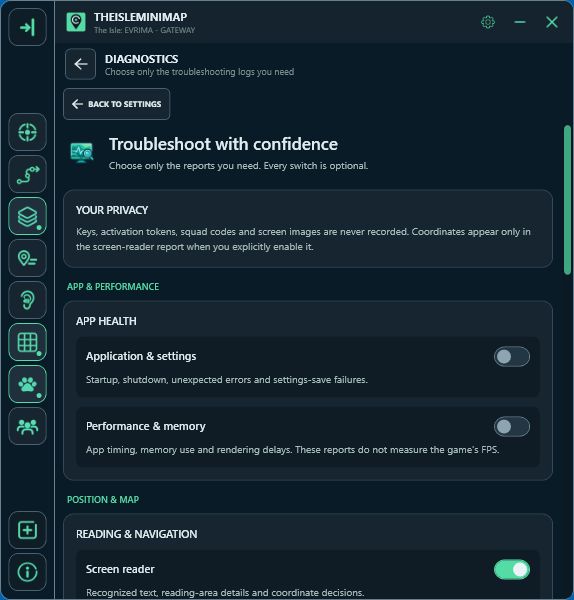
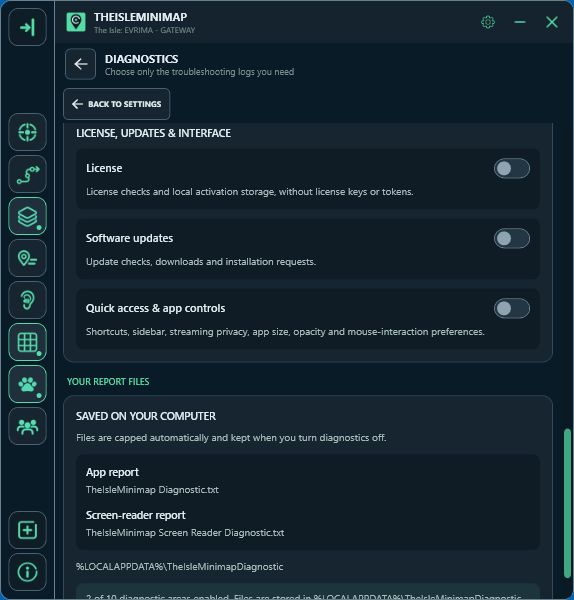
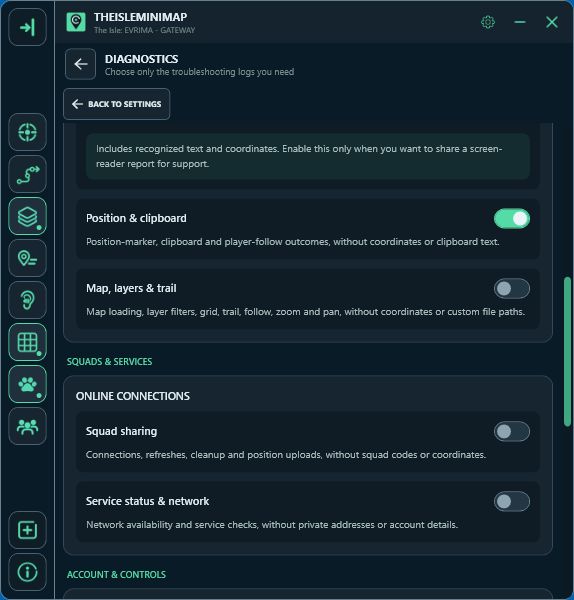
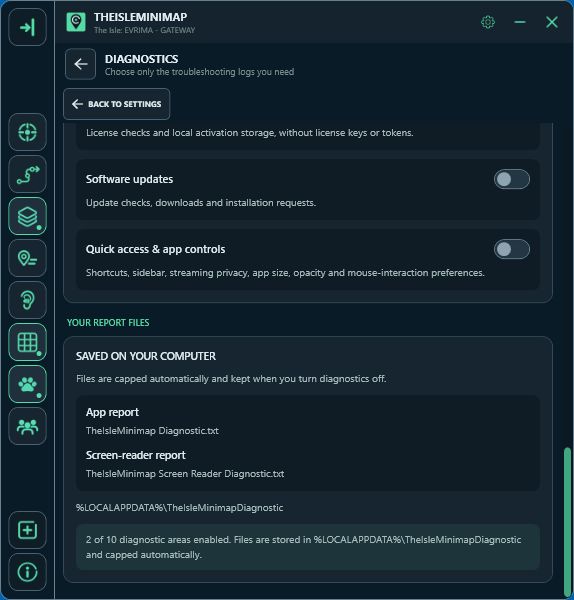
 Optional diagnosticsEnable only the requested area. Logging is off by default. Files have a size limit and are stored in
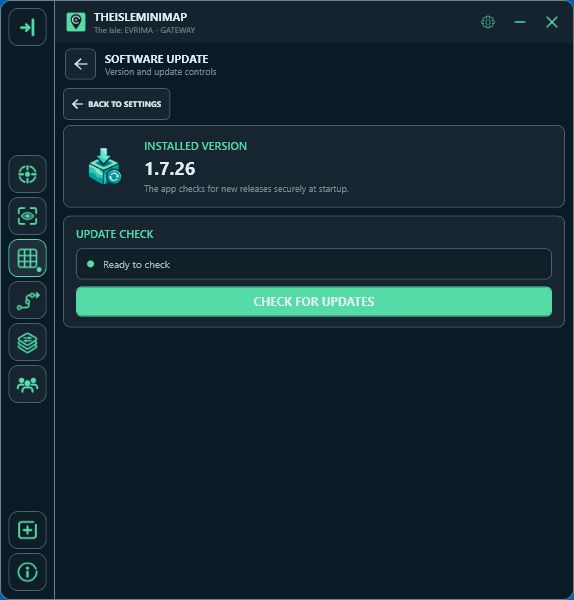
%LOCALAPPDATA%\TheIsleMinimapDiagnostic. Software UpdateThe app checks securely at startup. Open Software Update to see the installed version and check manually without restarting.
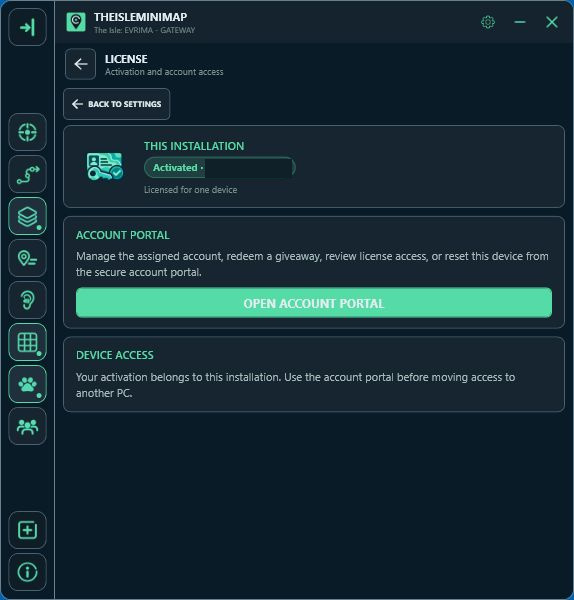
 LicenseView activation status and open the secure Account Portal to manage the assigned account, license or device reset.
More screenshots 7

Chapter 13
Troubleshooting checklist
- No position update?Confirm the game is in the foreground, open the complete Asset Location panel, verify your chosen reading mode and assigned key and check that the saved area still covers the panel. Clipboard capture remains available as a fallback.
- Overlay hidden by the game?Use windowed or borderless fullscreen. True exclusive fullscreen can cover normal Windows desktop overlays even when Always on Top is enabled.
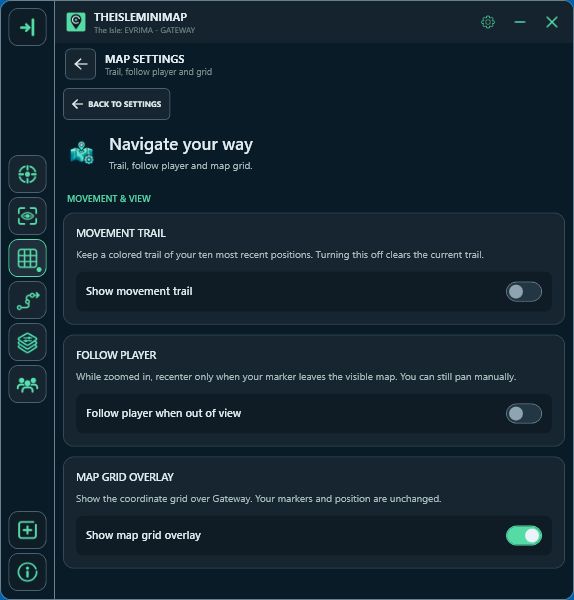
- Marker leaves the visible area?Enable Follow Player. It recenters only when the local marker moves outside the visible zoomed map.
- Squad does not connect?Check Service Status, confirm the license includes squad features, and verify the complete squad code before joining.
- Need support evidence?Enable only the requested diagnostic switches, reproduce the problem once, and open a support ticket. If support requests diagnostics, follow the instructions in your ticket. Never paste license keys or payment details.
For account, purchase or activation help, open Support. For focused explanations, use the related guides below.