
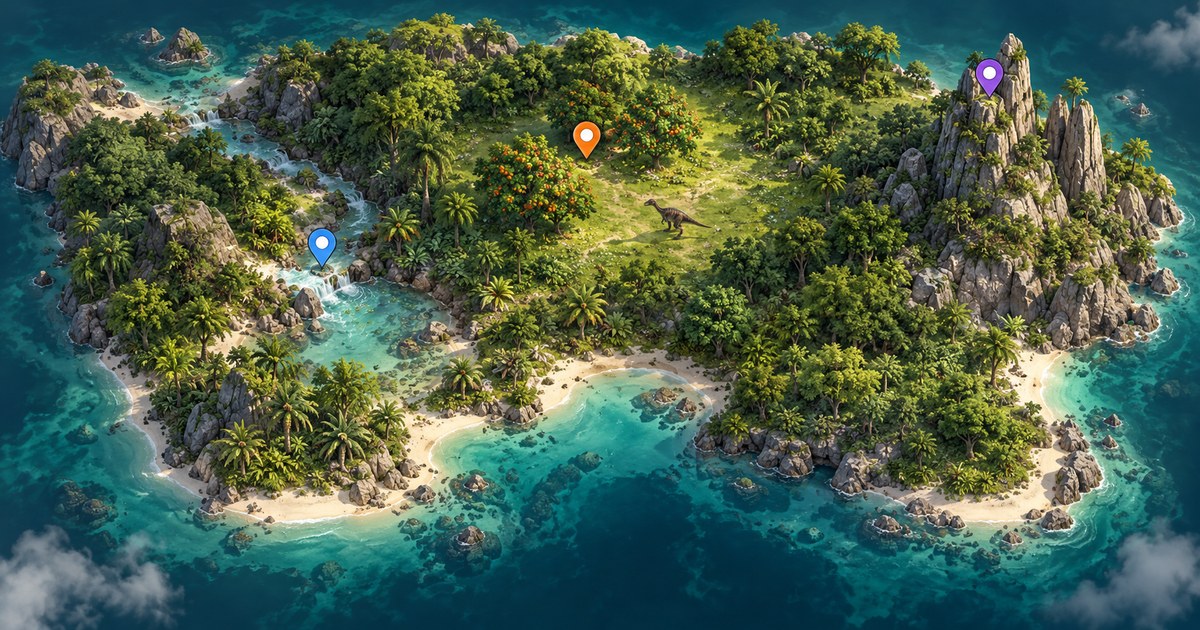
Found a useful water approach or a place you want to return to later? Solo Lifetime lets you keep up to three personal pins on your Gateway map. They are separate from your moving player marker and stay on your computer, so you can use them without creating or joining a squad.
Open Settings > Solo Settings, turn on Enable personal map pins, then return to the map and right-click a location. The app places the next unused pin. Right-click that pin again to remove it.
The cover is an AI-generated planning illustration, not an actual Gateway map or app screenshot. The screenshots in the steps below show the current Solo interface.
Open Solo Settings with your Solo license active
Open the app's Settings. Under Solo & Privacy, choose Solo Settings. This screen contains your own marker color and the personal map pin controls.
If the settings overview says Squad & Privacy and shows Squad Settings instead, the app is currently using Squad access. Personal Solo pins and the Squad destination pin are different tools. Having a Solo license on your website account does not change the access currently activated in the app.
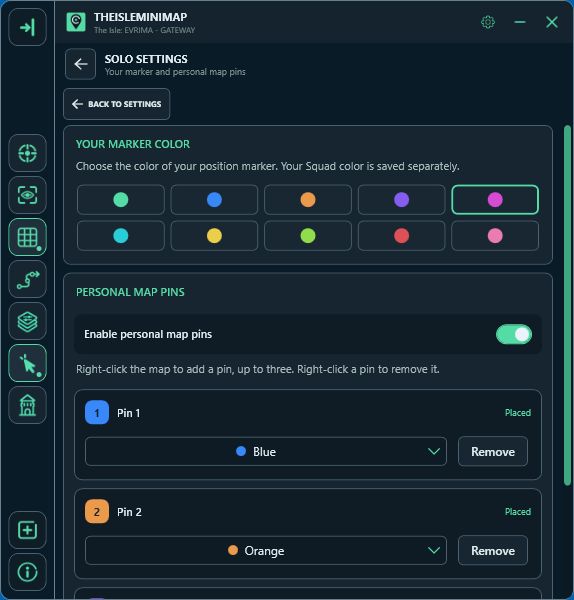
Give your marker and pins colors you can recognize
Choose a personal marker color that stands out against the map you normally use. Your player marker represents your latest captured position; the pins remain where you placed them.
In Personal map pins, choose a distinct color for each pin. A color already used by another pin is unavailable, so two pins do not end up with the same color. Pick an available option rather than repeatedly selecting the disabled entry.
You can use a simple personal convention: blue for a water approach, orange for a food-search area and purple for another place worth remembering. These are only suggested meanings. The app does not assign categories, automatically find those resources or add custom text labels to the pins.
Enable pins and place them on the map
- Switch on Enable personal map pins.
- Return to the map and find the location you want to save. Zoom in if nearby features are difficult to distinguish.
- Right-click the location. The next unused pin is placed there.
- Right-click a different empty location to place the next available pin, up to three.
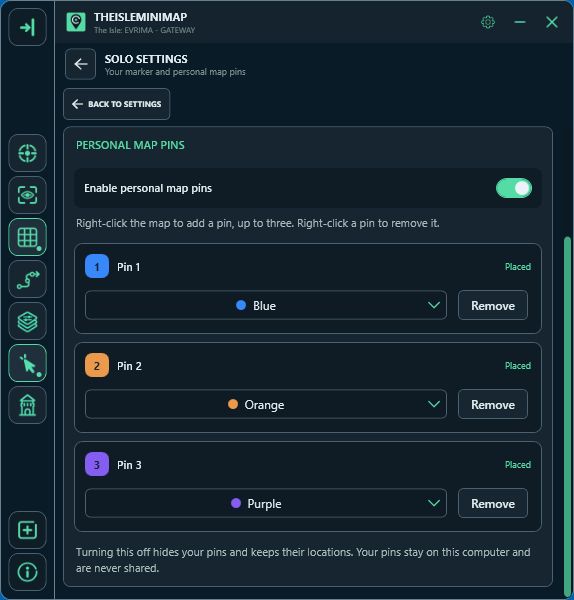
- Open Solo Settings to review which slots are placed and which are still unused.
When all three pins are placed, remove one before adding a different destination. You are saving the point you click, not automatically recording your dinosaur's current position.
Save a useful decision, not just another dot
A water pin is more helpful when it identifies the approach you intended to revisit, rather than an arbitrary point in the middle of a river. Likewise, a food-search pin can remind you which patch you wanted to check again without implying that food will still be present.
Keep your three places tied to the journey you are actually making. You might save one familiar reference, one resource approach and one next destination. If the session changes direction, replace the pin that no longer serves a purpose.
Personal pins are reminders, not live resource reports or safe-place guarantees. Check the game when you arrive. Our water guide covers approaches, while the Gateway landmarks guide helps you choose recognizable reference points.
Remove a pin to reposition it, or hide the whole set
To remove a pin, right-click its marker on the map or use that slot's Remove button in Solo Settings. Then right-click the new map location to use the next available slot. Check which slot is free before relying on a particular color.
Turning Enable personal map pins off does something different: it hides your pins and keeps their saved locations. Turn it back on to show them again. You do not need to delete all three just to clear the view temporarily.
The pins are saved locally for later sessions on that computer. They are not synchronized through your website account or copied automatically to another PC. Removing local settings during uninstall also removes locally saved preferences and pin locations.
Solo pins are private; the Squad destination is shared
| Tool | Available with | Who sees it |
|---|---|---|
| Up to three personal pins | Active Solo access | You, on the computer where they are saved |
| One shared destination pin | Active Squad access in a connected squad | The participating squad |
Switching to Squad access does not publish your personal pin set to friends. Use the shared destination pin for the group's next meeting point. The four-license plan guide explains how friends receive individual app licenses and then connect as a squad.
If a personal pin does not appear
- Check your active access: Solo Settings is shown when the app is using Solo access.
- Check the switch: personal pins must be enabled to show or place them.
- Check free slots: remove one if all three are already placed.
- Check the click: right-click empty map space to add a pin; right-clicking an existing pin removes it.
- Check your view: zoom out or pan to the area where you placed the pin.
If your own marker is not moving, that is a separate position-update setup question. Open Settings > Position Updates and use the screen-reading guide, or click Asset Location in The Isle for a clipboard update.
Solo pins: quick answers
Can I use personal pins without joining a squad?
Yes. They are local Solo tools and do not require a squad.
Does hiding pins delete them?
No. Turning the feature off keeps their locations. Remove deletes an individual saved point.
Can I drag a pin to move it?
Use the supported remove-and-place workflow: remove the old pin, then right-click the new location.
Will a saved water pin tell me whether other players are there?
No. It remembers a location, not the current activity around it.